
sumber: https://design.tutsplus.com/tutorials/how-to-draw-a-roaring-lion-step-by-step–cms-28155?_ga=2.154758008.1129022685.1564025513-1332346012.1564025513
The best thing about drawing is that it can be learned through… drawing. In this tutorial I will show you how to draw a realistic lion without too much theory or explanations—just a step-by-step process that will teach you a few useful things about drawing animals from scratch. You can also use this technique to draw other big cats!
A Warm-Up
Before we start, let’s take a look at some lions to understand what we’re going for:
1. How to Draw a Lion’s Body
Step 1
Draw a horizontal teardrop shape. This will be the chest and belly of our lion.

Step 2
The chest ends with the shoulders in the front.

Step 3
Now add the back to finish the main body.

Step 4
To achieve correct proportions of the legs, we need to find the level of the ground first. Generally, a standing lion has one height of its torso between the belly and the ground, but I want to create a slightly crouching pose, so I placed the ground higher.

Step 5
Before we add the limbs, draw the hips in the back.

Step 6
Draw all the legs and the tail. You don’t need to include any details—just capture their rhythm.

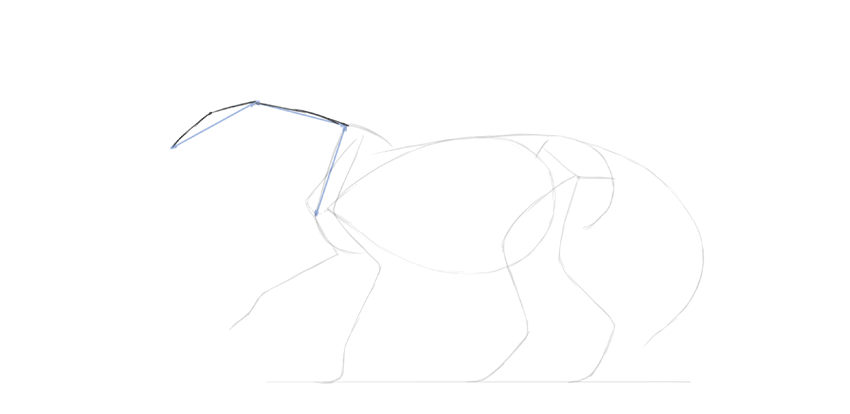
Step 7
To make the head proportional, use the length of the shoulders as a guide. The head will be exactly as long, and the neck can be slightly shorter than this.
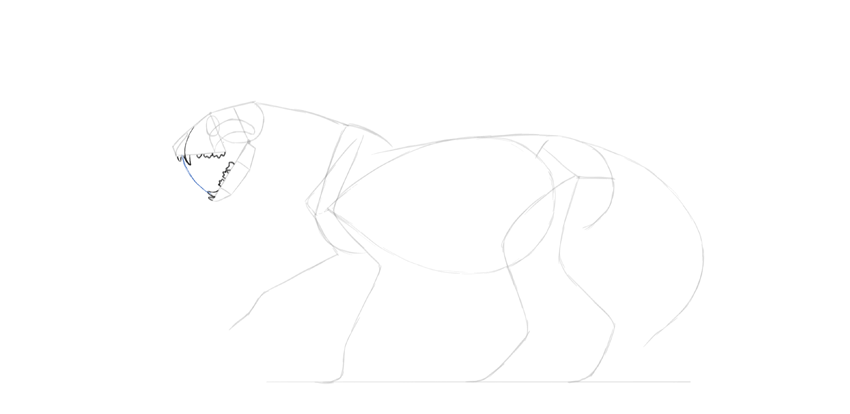
2. How to Draw a Roaring Lion’s Head
Step 1
Draw the main part of the skull. It’s made of the upper jaw and the braincase.

Step 2
Draw the lower jaw hinging from the bottom of the braincase. Its length can be defined by imagining it moving towards the upper jaw.

Step 3
Finish the lower jaw.

Step 4
Add the details of the skull that will be important for the rest of the anatomy: the eye socket, the cheekbone, and the hollow of the nose.

Step 5
Time for the teeth! They don’t need to be super detailed, but make sure the lower canine goes right before the upper one.
3. How to Draw Realistic Lion Anatomy
Step 1
Let’s add the paws now. Start with the “outer” toes—they’re close to the base of the paw, and they have a steep silhouette.

Step 2
Draw the inner toes now—not much larger, but more protruding and going down in the opposite direction.

Step 3
Add the paw pads.

Step 4
The joints are great anatomical landmarks, and if we set them properly, the lion will look correct even without detailed muscles. Start with the wrists…

Step 5
… and the ankles. They’re quite complex:


Step 6
Now, cross the elbows and knees with lines.

Step 7
Add narrow ovals on the inner side of these lines. These will be the elbows and the kneecaps.

Step 8
Add curves on both sides of each joint. This will be a good base for the muscles.

Step 9
Finally, add the heads of the shoulder bone and the thigh bone.

4. How to Draw a Lion’s Muscles
Step 1
We’ve got a great base for a realistic lion, so now we just need to follow it. First, draw the big cheek muscle between the jaws.

Step 2
Place the nose inside its cavity, and the eyeball inside the socket.

Step 3
The area with the whiskers is dragged towards the eye by muscles when the lion is roaring. This will let us see the teeth.

Step 4
To draw the ear, first draw its base…

… then draw its sides, folding it as you please.


Step 5
Cover the paws with fur, making them soft and round. Keep in mind they get pretty flat in the front if the lion is showing its claws.

Step 6
Now, time for the actual muscles of the body. Connect the wrist with the elbow area, and the ankle with the knee area.

Step 7
Add the shoulders and the thigh.

Step 8
Close the shape of the limbs by adding more muscles:

Step 9
Finish the paws:


Step 10
Outline the whole silhouette based on the shapes we already have.

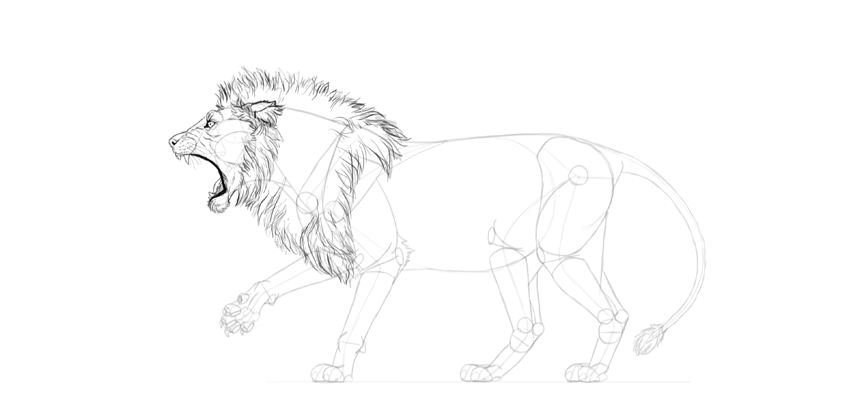
Step 11
We have the body of a powerful big cat, but it looks more like a muscular lioness than a lion. Let’s add the mane! Start with little tufts of hair here and there…

… then add a ruff around the head.

Finally, cover the whole neck with long, fluffy hair.

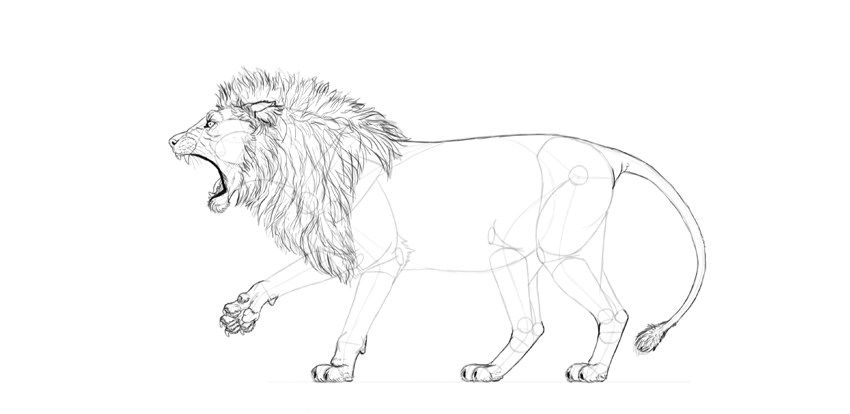
5. How to Draw a Realistic Lion
Step 1
Let’s finish this picture! Draw the details of the face. Notice how the skin gets wrinkled over the muscle pulling the whiskers back. This will add to the angry expression of the lion. Keep the eye wide open—this is how a lion tries to intimidate its opponent. If you make the eyes closed, it will look like yawning or sneezing!

Step 2
Draw the outline of the mane with light, wiggly lines. Try to draw tufts rather than the single hair.
Step 3
Draw the rest of the mane, again drawing tufts, not hair. Try to think about the shadows between the tufts, to reveal them by contrast. You can learn more about drawing fur here:
 TEXTURESHow to Draw Fur

Step 4
Add the details to the paws.

Step 5
Draw the back and the tufted tail.
Step 6
Outline the rest of the body. Keep in mind all the parts of the body are covered with one piece of skin, and thus they should not be outlined separately.

Step 7
Add the subtle outline of the muscles. This is not necessary, but it will help add some volume to the body,

Step 8
Finally, remove the guide lines completely and clean up the drawing.

Feel free to add some shading as well.

Komentar Terbaru