sumber:https://www.aplikasipc.com/tutorial-cara-install-prestashop-di-localhost-dengan-xampp/
You want to install PrestaShop on localhost? This can indeed be an alternative as a study before you actually create a real buying and selling site on a server with a domain. PrestaShop is an open source e-commerce CMS (Content Management System) written using the PHP programming language and MySQL database. PrestaShop has also supported gateway payments. PrestaShop has the largest community in the world dedicated to learning about e-commerce.

PrestaShop To install PrestaShop
on XAMPP of course you must have XAMPP installed on your computer. Compiled from Wikipedia, XAMPP is free software, which supports multiple operating systems, which is a compilation of several programs. Its function is as a stand-alone server (localhost), which consists of the Apache HTTP Server program, MySQL database, and language translator written in the PHP and Perl programming languages. The name XAMPP stands for X (any four operating systems), Apache, MySQL, PHP and Perl. This program is available under the GNU General Public License and is free, is an easy-to-use web server that can serve dynamic web page views. To get it, you can download it directly from the official website.
Steps to Install PrestaShop
Before you proceed further, prepare in advance all the software needed. Download and install the application on your computer. If you don’t have XAMPP on your computer yet, you can download XAMPP first, then install it on your computer. Then proceed with downloading PrestaShop.
1. If your computer does not have XAMPP installed, open the XAMPP installation file and select the required components by ticking the options “Server -> Apache and MySql”, “Program Languages -> PHP”, “Program Languages -> phpMyAdmin”.
2.After selecting these components, click “Next”, then the installation process will run to completion. Then click “Finish”.
3.Then open XAMPP. To run it, click the “Start” button on the “Apache” and “MySql” options.
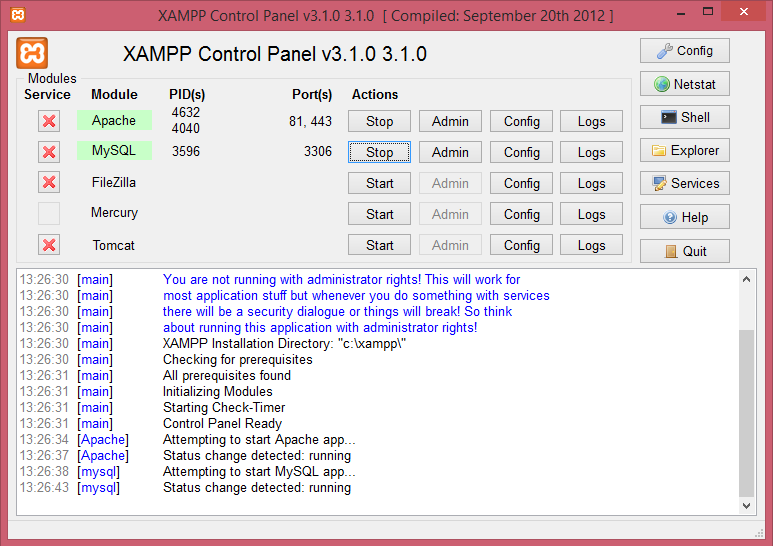
Running XAMPP
4. The next step is to extract the PrestaShop.zip folder that you downloaded earlier. Then paste the folder in the “Local disk C -> XAMPP -> htdocs” directory.
5.Next, open PHPMyAdmin “http://localhost/phpmyadmin” (without quotes) in your browser to create a database. Enter the name of the database as you wish, for example “prestashop”, then click the “create” or “create” button.
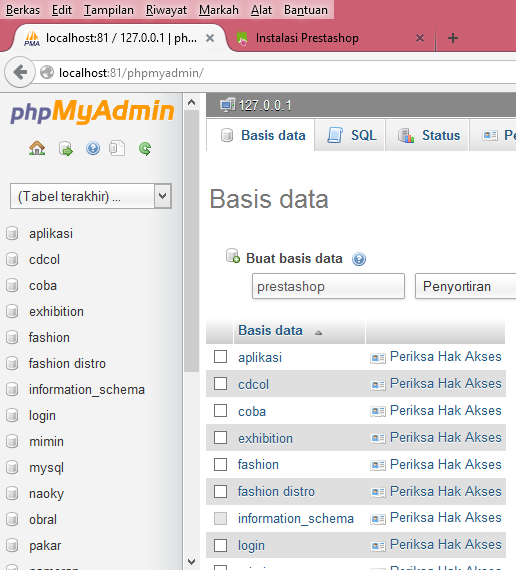
Creating Database
6. Now open the Prestashop Setup Wizard using the link address “http://localhost/prestashop” (without the quotes). Then select “Next”.
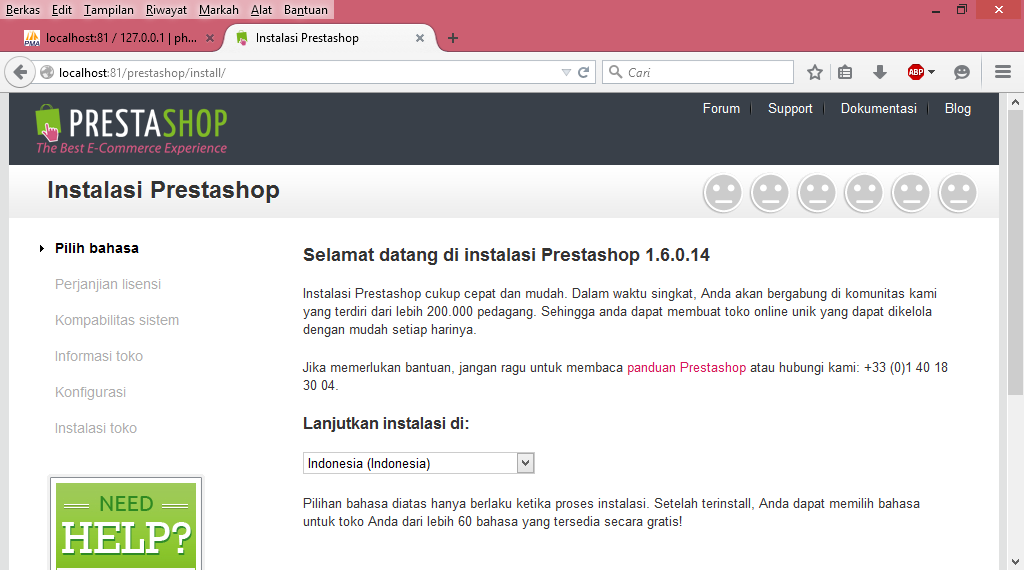
Getting Started Install PrestaShop
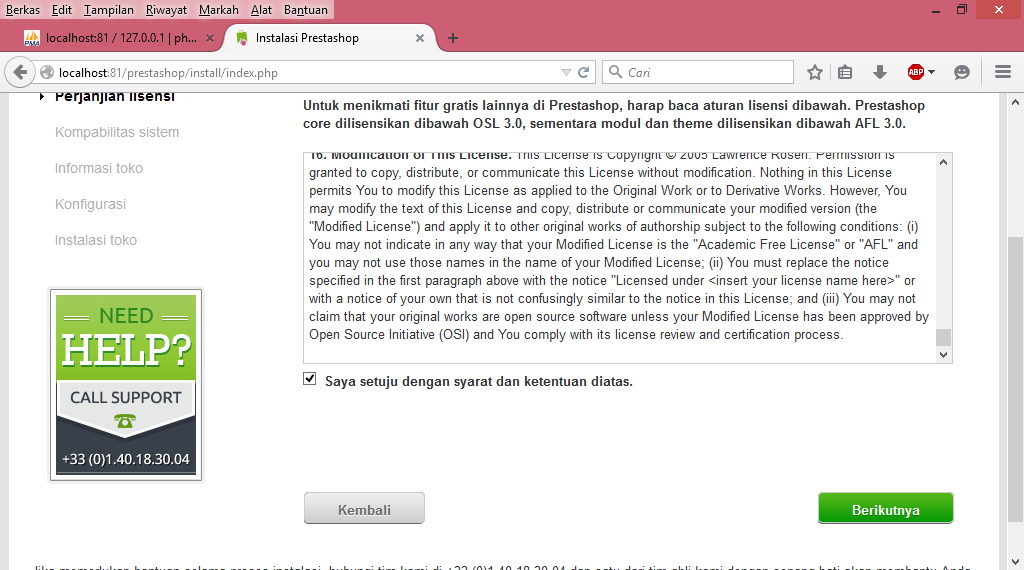
7. Then in the next install step, put a check mark as approval. Then click “Next” or “Next”.
Install Prestashop
8. then fill in all the requested information data and click “Next” or “Next”.
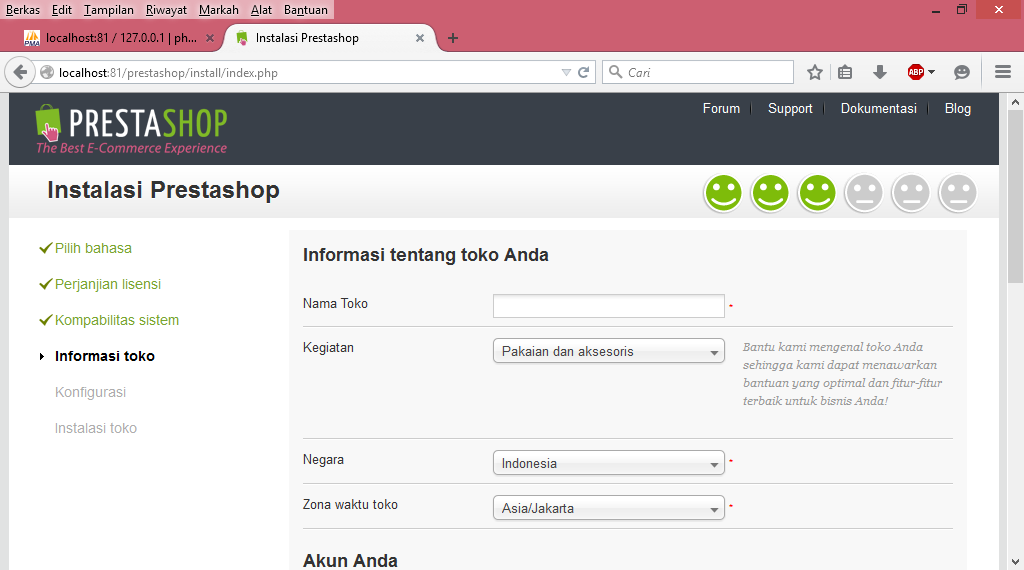
PrestaShop Install Data Filling
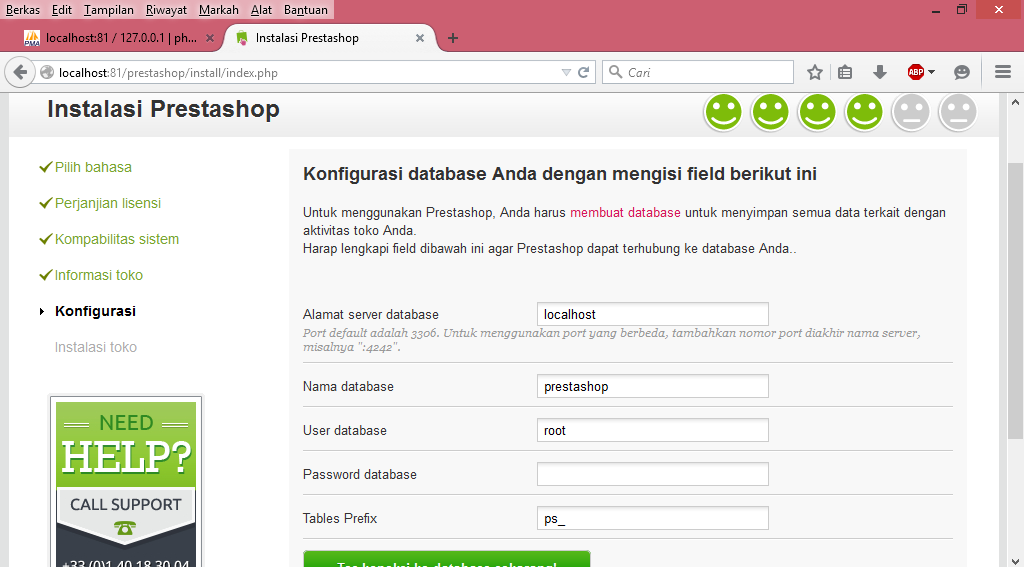
9. The next step is to fill in the data according to the database that you previously created in PHPMyAdmin. Click “Next” or “Next”.
Database Information Filling
10. Next, let the installation process run to completion.
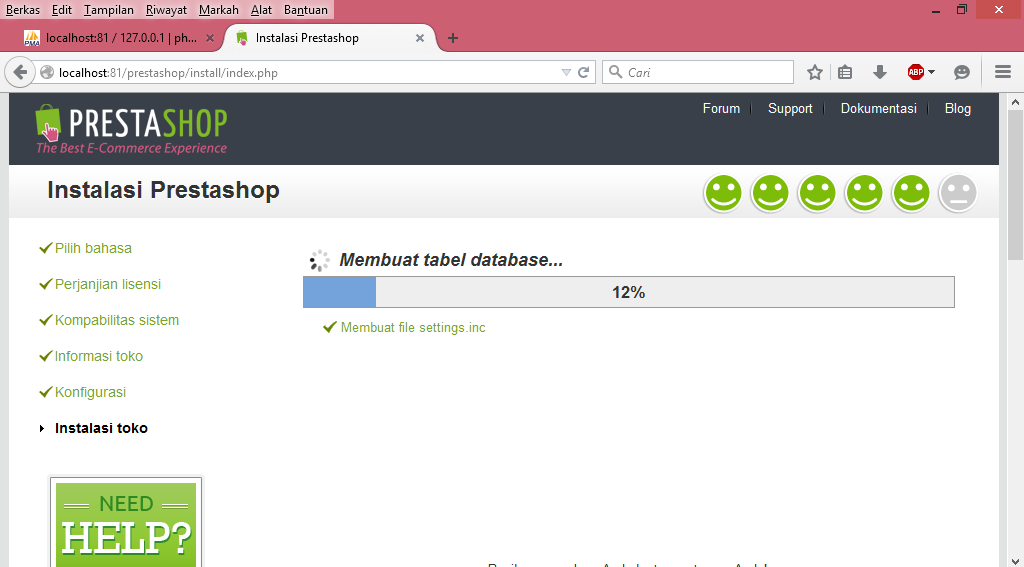
PrestaShop Install Process
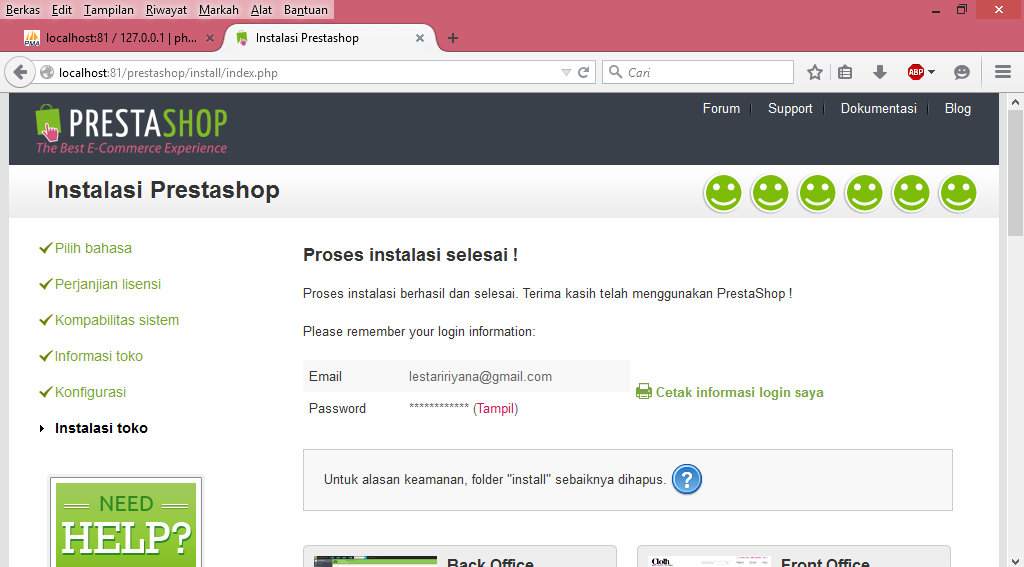
11. After the installation process is complete, a description will appear that the installation process is complete.
Finished Installing Prestashop
12. In order to enter the PrestaShop that you installed earlier, you are asked to delete the “install” folder in the “Prestashop” folder which is in the “Local disk C ->XAMPP ->htdocs” directory.
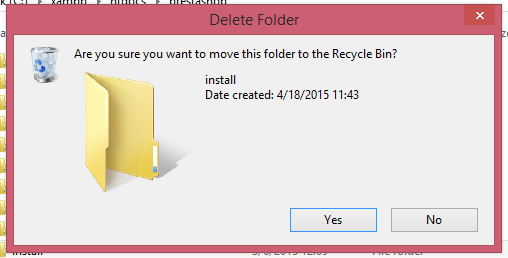
Delete Install Folder
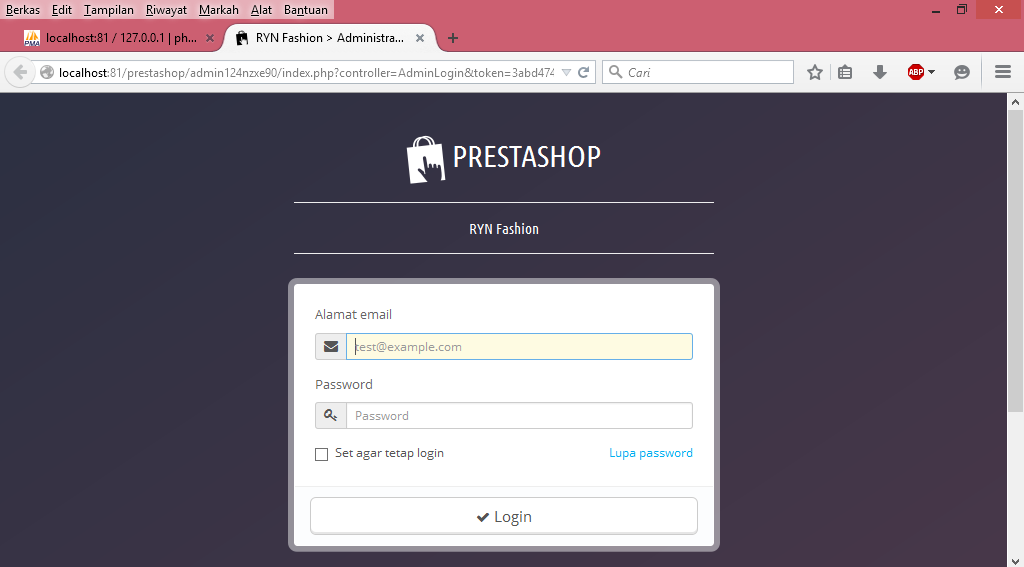
13. If the “install” folder has been deleted, then you can now go to your PrestaShop web. Type in the appropriate email address and password during the PrestaShop installation process. Then press the “Login” button.
PrestaShop Login Page
14. If you login successfully, you will enter the PrestaShop dashboard page. Like the image below.
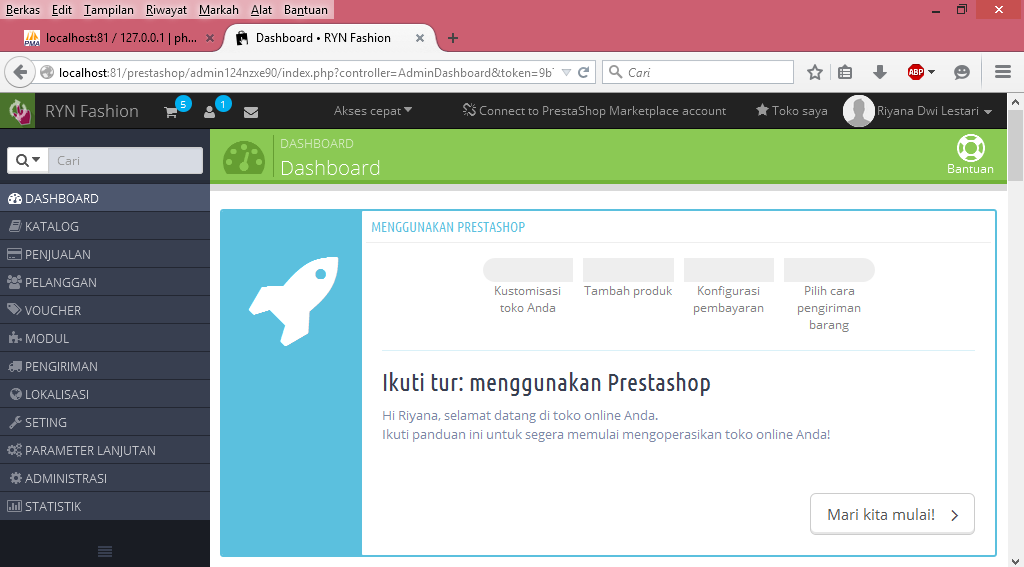
PrestaShop Dashboard
15. You can also see the page of your buying and selling site, for example in the image below.
Buying and Selling Website Display Using Prestashop Isn’t it easy to install PrestaShop on Localhost? Most importantly make sure that you have XAMPP and of course the PrestaShop files. Hopefully this article can be useful for you.


Komentar Terbaru